Showing posts with label how to. Show all posts

Tuesday, April 23, 2013

Vanilla Bean & Sea Salted Caramel Cupcakes


As a Raley's Something Extra Try It member, I was sent a box of Raley's Vanilla Bean cake mix, a custom recipe for Salted Caramel Cream Cheese Frosting, cupcake wrappers, some coupons, and a handy whisk to help me put this concoction together!


As a huge fan of vanilla, especially vanilla bean, I was really excited to try this recipe. I mean, who doesn't like cupcakes, vanilla, cream cheese, and caramel?!


The cake mix was easy enough, just add 2 eggs, 1/2 cup melted butter, and 1 cup milk, and whisk together. Then add to baking cups, 2/3 full, bake at 400 deg for 14-16 min. I used my convection bake setting and they were done in 12 min.


Making the caramel was much easier than I thought it would be. Just add the heavy whipping cream, brown sugar, and butter, bring to a boil, then simmer at a low boil for 10 minutes. Add the vanilla and salt, stir, then put in the fridge to chill.

The frosting was the most difficult (for my arms at least - that's right, I use a hand mixer. I haven't been able to get my hands on a stand mixer yet. They're so expensive!). Using some of the caramel you made, cream cheese, butter, and powdered sugar, mix them all together until they're well mixed and fluffy.

There was tons of frosting leftover so I put it in a container in the fridge. Not sure what I might use it on yet, but you never know! It might come in handy. Using the remaining caramel, drizzle it over the cupcakes and add a pinch of salt to each. Man these are so good! My husband and I can't eat 22 cupcakes between the 2 of us, so I ended up taking these to work to share the deliciousness. They were a hit!

The finished product!

Have you made caramel sauce from scratch before? Or frosting? This took me about an hour and  a half to complete from start to finish, which I don't think is too bad considering the results! 

Recipes:

Cupcakes:
  • 1 (16oz) box of Raley's Vanilla Bean Cake Mix

Salted Caramel
  • 1/2 cup heavy cream
  • 6 tbsp. brown sugar
  • 2 tbsp. butter
  • 1 tsp. vanilla
  • Generous pinch sea salt
Frosting
  • 6 oz. cream cheese, at room temp
  • 1/4 cup butter, at room temp
  • 1 tsp vanilla
  • 3 cups powdered sugar


Instructions:
  1. Prepare cake batter according to package directions. Let cool when done baking.
  2. To Prepare Caramel: bring cream brown sugar and butter to a boil in a small saucepan. Reduce heat and keep at a low boil for 10 minutes, stirring occasionally. Stir in vanilla and salt and transfer to a small bowl; cover and chill.
  3. To Prepare Frosting: beat cream cheese, butter, vanilla, and 3/4 of caramel together until light and fluffy. Slowly beat in powdered sugar until smooth.
  4. Spread over cupcakes and drizzle with remaining caramel, warming for a few seconds in the microwave if too thick. Add a small sprinkle of sea salt to each cupcake.


Disclosure: I received this product free from the Something Extra Try-It program but all the opinions are my own.

Monday, April 15, 2013

Gardening

We've always talked about having our own garden and growing some of our own food but hadn't had the chance to actually put the idea into action. Recently we were able to set aside some funds and thanks to the Home Depot Black Friday Spring sale, were able to get most things on our list for a pretty good discount!

We're also trying to spruce up our home and yard for our family reception/party in June and I can't wait to show off this baby!


We were able to get a 4x4 raised planter bed and they had a great deal on already started veggies, so we picked up 3 kinds of tomatoes, 2 kinds of cucumbers, green bell peppers, and red and white sweet onions. I cannot wait for these to start producing fruit! I want to get a few more (or even use pallets if I can find a way to get them home) to start some other fruits and veggies like garlic and maybe even some herbs.


We also picked up some carrot and watermelon seeds and are trying to start these on our own. The carrots should be germinating (7-8 days) and hopefully start sprouting soon. They're in the pot (an idea I got from Pinterest - seriously, I've learned so much since joining the site). We're hoping the watermelon (planted to the side of the planter box and pot) actually take. My husband was such a good sport and we worked for 4+ hours to get this all set up.

This beauty was an idea I got again from Pinterest (see my comments about it here). This was great! It was also very quick. I laid the pots out and painted one coat, let them dry while I went to work in another area of the yard, when dry painted a second coat, let that dry, and they were ready! The plants were 2/$1 during the same (talk about a good deal!) and we picked a variety to add color. I didn't paint the entire inside of the pot since it would be covered by soil and plants anyway, and only painted the inside rim to the bevel.

Friday, April 12, 2013

Pinteresting Projects

Thanks to Pinterest, I've been trying out all sorts of new things! I was determined to not be one of those people who spends hours a day pinning things, but then never putting it to use. So here are a few things I found on Pinterest and decided to try. The pictures below are mostly of my finished projects with links to the Pinterest post below (unless stated otherwise)

Crocheting: I've always wanted to learn to crochet. I've known how to knit for a long time but people kept telling me that crocheting was so much easier. I did not believe them. At all. Especially after looking at some of the tutorials I found online, but after trying it, it is WAY easier and so much faster. Also, I thought I would share that on my trip to the crafting section at my local Walmart, when looking for some starter crochet needles, I was so confused because the sets only came with one needle of each size. I thought I was going to have to buy 2 packs to be able to do anything until I picked up a how-to book and read through it. NO ONE EVER TOLD ME YOU ONLY NEED ONE NEEDLE TO CROCHET. Yeah. So some of you might find that pretty funny.

Crocodile Stitch Scarf
This scarf was only my second project after starting crocheting, and let me tell you, it was hard. I started this scarf over 5 times before I got the pattern down and I watched Yarn Muses (see link through Pinterest) videos over and over for help. BUT once I got it down, it was a piece of cake!

Chunky Infinity Scarf 
I made this after the crocodile stitch scarf. No pattern  used, just made it myself! Couldn't have done it without Pinterest's help teaching me to crochet in the first place.

Coffee Cozies
This was actually the first project I worked on when learning to crochet. Let me tell you how easy it is. With never having done a single crochet stitch before, I was able to make this in about 30 minutes. Talk about easy gifts! Not to mention they save paper from not having to use those cardboard sleeves. They work on mugs too!

Outdoors:
DIY Planters
The original post for this had a birdbath on top, but I liked the idea of topping it off with flowers. Some advice, the tutorial says to add the potting mix as you add the pots to the rebar, but this makes inserting the plants very difficult. With the exception of the bottom pot, I would wait to add the soil until after you have the plants in the pot. I also didn't use a primer on the terracotta pots, used 2 coats of Rustolium spraypaint from Home Depot, and they turned out great!

I've tried a bunch of other stuff including recipes and things I've found but didn't take photos of my finished product. I've even created a board of things I've tried and put little notes in the pins. Feel free to check it out!

Saturday, January 7, 2012

DIY Teeth Whitening - Super Fast, Cheap, and Simple

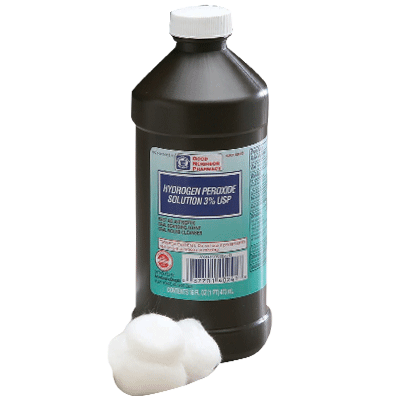
My aunt told me this secret about a  year ago, maybe two now, that I think really works. Mix 1 part warm water with 1 part hydrogen peroxide, swish in mouth, and repeat a few times. When she first told me this, I thought it was nits and maybe a little dangerous (I thought it could make me sick) but if you look on the bottle, you can actually use hydrogen peroxide as a mouth wash! So I tried it. I didn't notice much of a difference at first, but after doing it a few days in a row I could really tell it was making a difference. Don't get me wrong, it's not going to give you amazing results the same way bleach would, but it's much cheaper than a kit or strips. I bought a bottle of hydrogen peroxide at my local Target for less than 60 cents. Plus, it doesn't leave your teeth feeling achy or sensitive the way bleach can. My teeth are sensitive as it is so I love that I can use this without worrying my teeth will ache for the next few days.

Source

I like to do this at night, before bed since it helps clean my mouth as well as whiten my teeth. Since I'm going to bed, I know I won't be eating or drinking anything that could just reverse all the cleaning up I've just done. After I use it as a mouthwash, I like to take my toothbrush and dip it in the mixture and brush my teeth a bit with it, just for extra measure.

Has anyone else tried this? I find it works great since I drink coffee or tea on almost a daily basis, it lifts the surface stains that can accumulate. Let me know if you try this and what you think!

Saturday, December 31, 2011

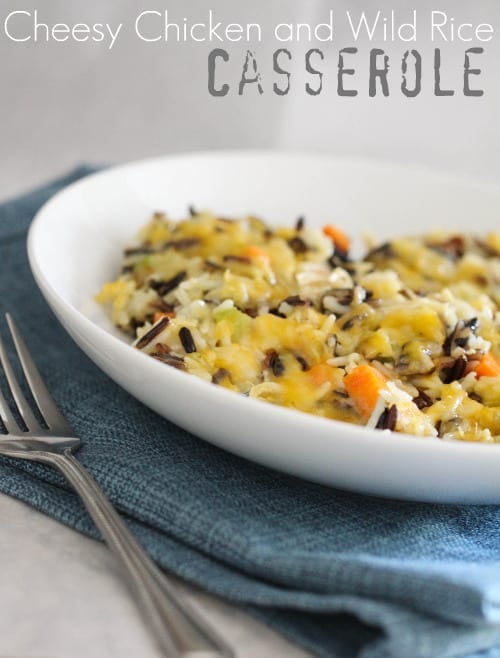
Cheesy, Chicken and Wild Rice Casserole

 I have recently become very addicted to Pinterest, spending hours looking through people’s pins, finding crafts I would love to try and recipes that sound amazing. One day last week I decided that I was going to stop imagining what one of them would taste like and actually make it. The recipe I decided on was a Cheesy Chicken and Wild Rice Casserole. From the recipe it sounded delicious, not exactly healthy, but delicious nonetheless.


Cheesy Chicken and Wild Rice Casserole
3 Tablespoons extra virgin olive oil
1 medium onion, finely diced
3 stalks celery, finely diced
3 carrots, peeled and diced*
*I subbed for sliced mushrooms
2 Tablespoons fresh minced garlic
2 Cups shredded, cooked chicken breast
2 Cups steamed white rice (1 cup dry)
16 oz prepared wild (1 cup dry)
1 teaspoon kosher salt
½ teaspoon black pepper
¼ teaspoon garlic salt
______
Cheese Sauce
4 Tablespoons butter
¼ Cup all-purpose flour
¼ teaspoon kosher salt
¼ teaspoon black pepper
2 Cups chicken broth
2 Cups shredded cheddar cheese
Top with 1 ½ Cups shredded cheddar cheese*
*I used a little more cheese on the top because 1 ½ cups wasn’t enough to cover everything.


1.  Preheat oven to 350 degrees F.  Heat oil into a medium dutch oven or pot over medium heat.  Sauté onion, celery and carrots until softened, about 10 minutes.  Stir in garlic and cook for 1 minute.  Stir in chicken, both rices, salt, pepper and garlic salt.  Reduce heat to low.


2.  To prepare cheese sauce: melt butter into a medium saucepan over medium high heat.  Whisk in flour, salt and pepper then slowly pour in chicken broth whisking continuously.  Whisk until thick and nearly boiling then stir in cheese until melted.  Pour cheese sauce into rice mixture then transfer to a 9×13 inch baking dish. Top with additional cheddar cheese and bake for 25-30 minutes or until cheese is melted through.  Serve. *I cooked for only 22 minutes and it was plenty so be careful not to burn it!
8-10 servings

I made a special trip to my local Bel Air to pick up extra ingredients I would need since my Safeway doesn't have a bulk foods section for things like whole grains, rice, etc. I decided to sub carrots for sliced mushrooms because neither my boyfriend nor I care for cooked carrots, and I had to use extra cheese on top in order to cover the whole dish.

Left: ingredients ready for the cheese sauce
Right: ingredients prepped to be sautéed 
In all, it took me approximately two and a half to three hours (maybe a bit more) to prepare and cook, but I think it was totally worth it. I cooked the white and wild rice together in my rice cooker, using the brown rice settings knowing that the wild rice would have to cook a bit longer than the white, and it worked out great! Plus it saved me some time from having to cook them 20+ min. each separately. I also had to pre-cook the chicken before sautéing the veggies, but that didn’t take long.

 Once the rice was done, I sautéed the veggies for 10 min. as the recipe calls for, added the garlic and chicken, and let it simmer while I prepared the cheese sauce. The recipe said to “whisk continuously until the sauce [became] thick and almost to a boil”. What it didn't say was how long that would take! It probably took about 15 minutes for this to happen. If I had known how long it would take, I probably would have started it at the same time as the veggies.
Top: veggies and chicken in the pan
Bottom: all mixed together with the cheese sauce
Once everything was mixed together and placed in the oven, I set my timer for 22 min. even though the directions said to let it cook for 25-30, and it turned out to be perfect. If I had let it go any longer, the cheese on top would have burned, so be aware if you decide to make it yourself.

The finished product
This is probably the most work I have ever put into a dish, and let me tell you, I was worried it was going to turn out terribly! BUT turns out it was amazing, just as I had hoped. My boyfriend and his brother loved it. We liked it so much we ended up eating the whole thing in less than a week (it was great reheated too!). If you’re looking for a great, hearty, winter dish, I would highly recommend this! If you make it, let me know what you think or if you made any adjustments of your own. Would love to hear what you think! Also, if anyone would like an invite to Pinterest just let me know :)

ShareThis